Drawing Techniques
How a Realistic Coloured Pencil Drawing Comes Together
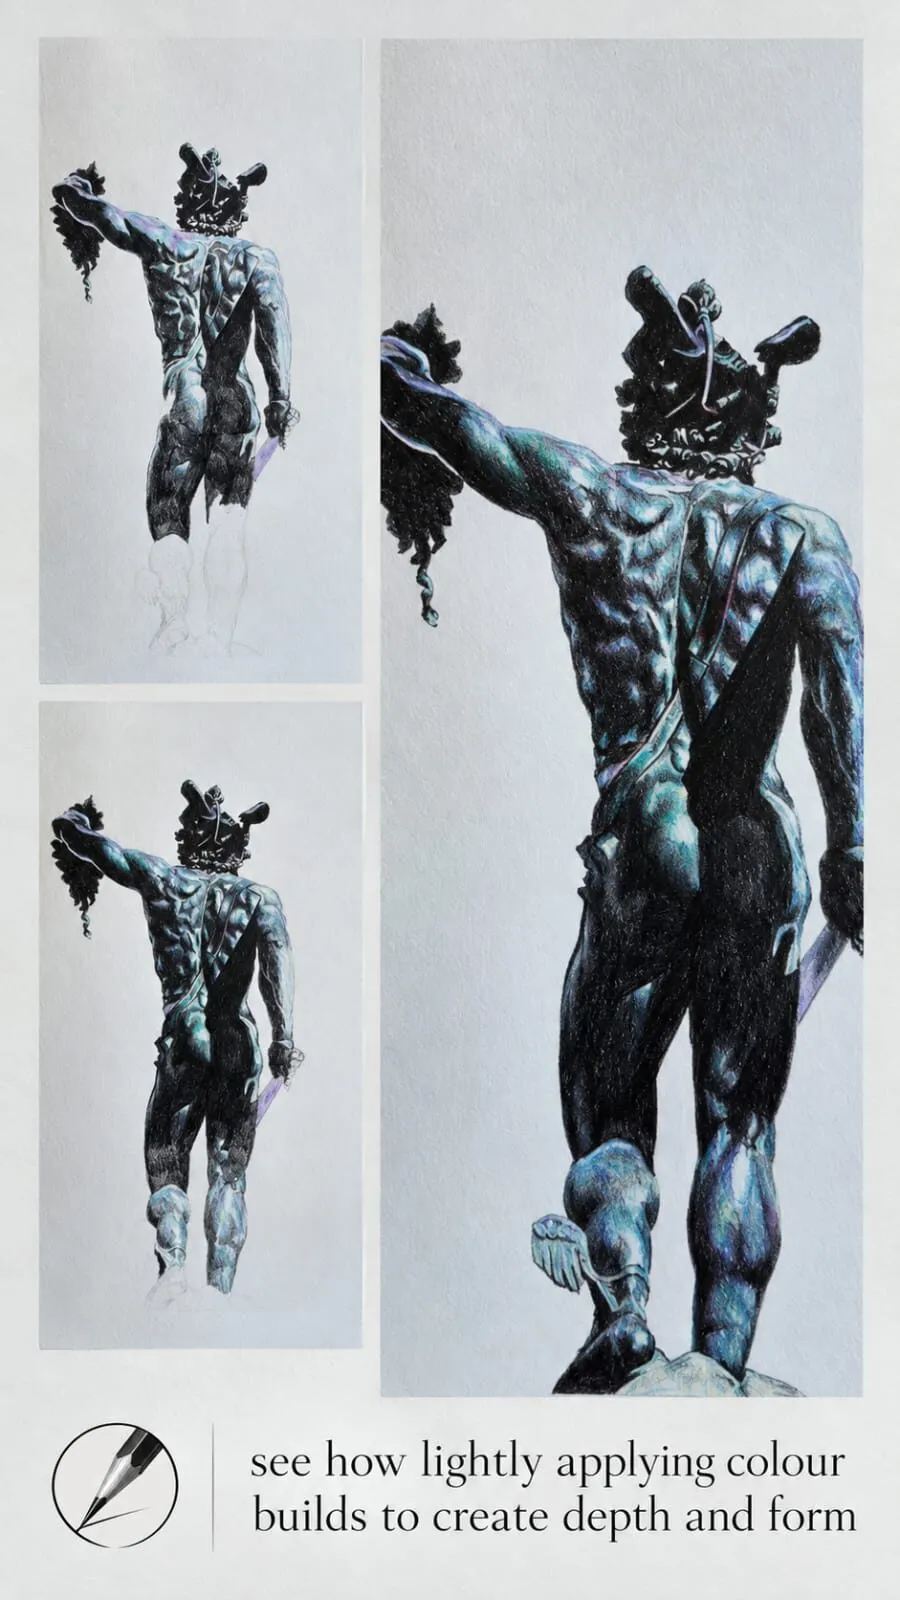
Realism is built in stages: layout, base colours across the whole coloured pencil (colored pencil) image, then final detail. See the process in progress figures.
This guide contains affiliate links. If you buy through them we may earn a small commission at no cost to you. How this works.
Jump to recommended products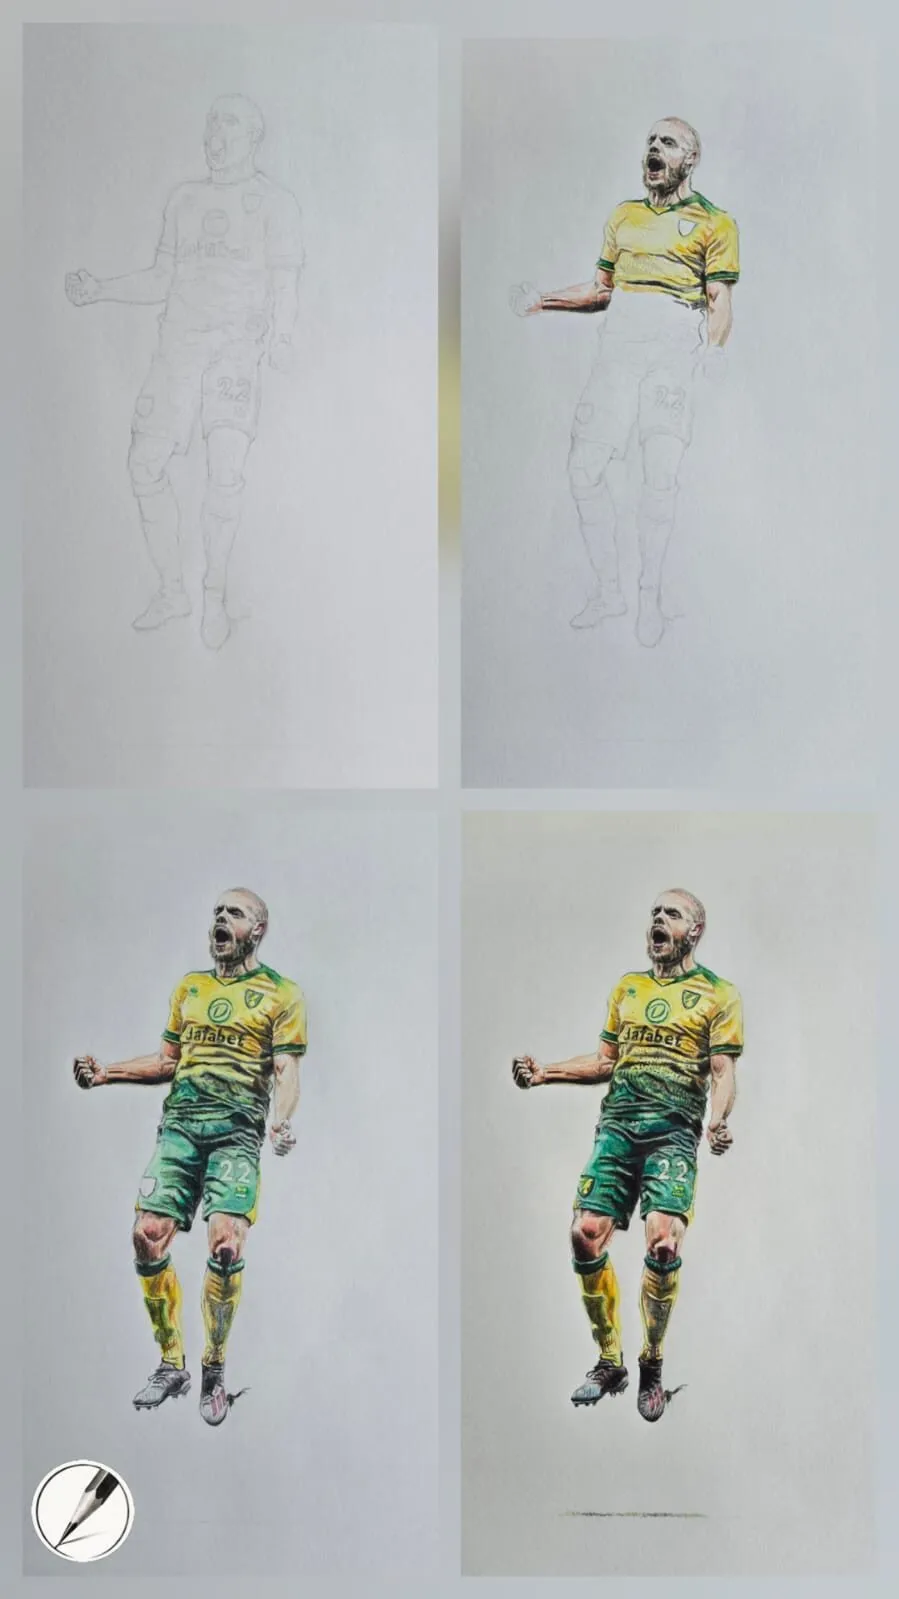
Key takeaways
- ◆Complete the whole layout first, so the composition and proportions are settled before any colour goes down.
- ◆Lay base colours across the entire image rather than finishing one area at a time.
- ◆Save the final layers of detail for last, when the form, colour and value are already working.
- ◆Work top down and build colour as you go, so each stage adds depth to the one before.
- ◆Skills improve by returning to a theme, and shadow and pose can add movement and life.
It is easy to admire a finished realistic drawing and assume it was built from the surface inwards, one perfect area at a time. In practice it never works like that. A realistic drawing arrives in stages, and each stage covers the whole image before the next begins. Understanding those stages, and resisting the urge to jump ahead, is one of the biggest steps you can take towards more convincing work.
This guide walks through that process using Michael’s progress figures, each of which shows a single drawing at several points in its life. Then it turns the process into a practical sequencing checklist you can follow on your own drawings.
The big picture: three stages
Every one of Michael’s progress figures follows the same broad arc.
- Layout. Complete the whole layout first: outline, proportions, placement and the main shapes.
- Base colours. Lay in the base colours across the whole image.
- Final detail. Add the final layers of detail, contrast and highlights.
The order matters as much as the content. Each stage rests on the one before, and problems are far cheaper to fix early than late.
Stage one: complete the layout
The footballer figure begins with a pencil layout, and only that. No colour, no shading. It is a full drawing of the shapes: where the figure sits on the page, the proportions of the body, the position of the ball and the edges of the main forms.
Finishing the whole layout before touching colour has several benefits:
- Proportion errors show up early. Mistakes in the drawing are almost impossible to correct once heavy colour is down, particularly on smooth paper.
- The composition is settled. You know exactly how the image fills the page and can adjust before committing.
- You can lay colour freely. With the shapes secure, your attention is free for colour and value.
For accurate transfer, especially of complicated subjects, a grid drawing tool is a reliable way to establish proportions. Keep the layout lines light so they disappear under the colour.
Stage two: base colours across the whole image
Once the layout is secure, the base colours go on. The key idea is to work across the entire image rather than finishing a single area. Every part of the drawing reaches roughly the same level of resolution together.
The stadium figure is a clear example. It shows a football stadium in snow at three points: the layout, then the base colours across the whole scene, and then the final layers of detail. Notice how at the middle stage the whole picture already holds together. The sky, the pitch, the stands and the snow all have colour, though none has fine detail yet.
That approach pays off in three ways:
- Colour and value stay balanced. You judge every tone relative to its neighbours, so no single area drifts too dark or too bright.
- The drawing always looks coherent. If you stop at any stage, the image still reads as a whole.
- Corrections are easy. A wrong colour is far easier to alter when it is a light base layer than a fully worked passage.
Base colours should be built lightly. Light pressure preserves the tooth of the paper for later layers, which is the principle behind how to layer coloured pencils. Muted underlayers can also establish shadow and temperature early, as explained in underpainting in coloured pencil.
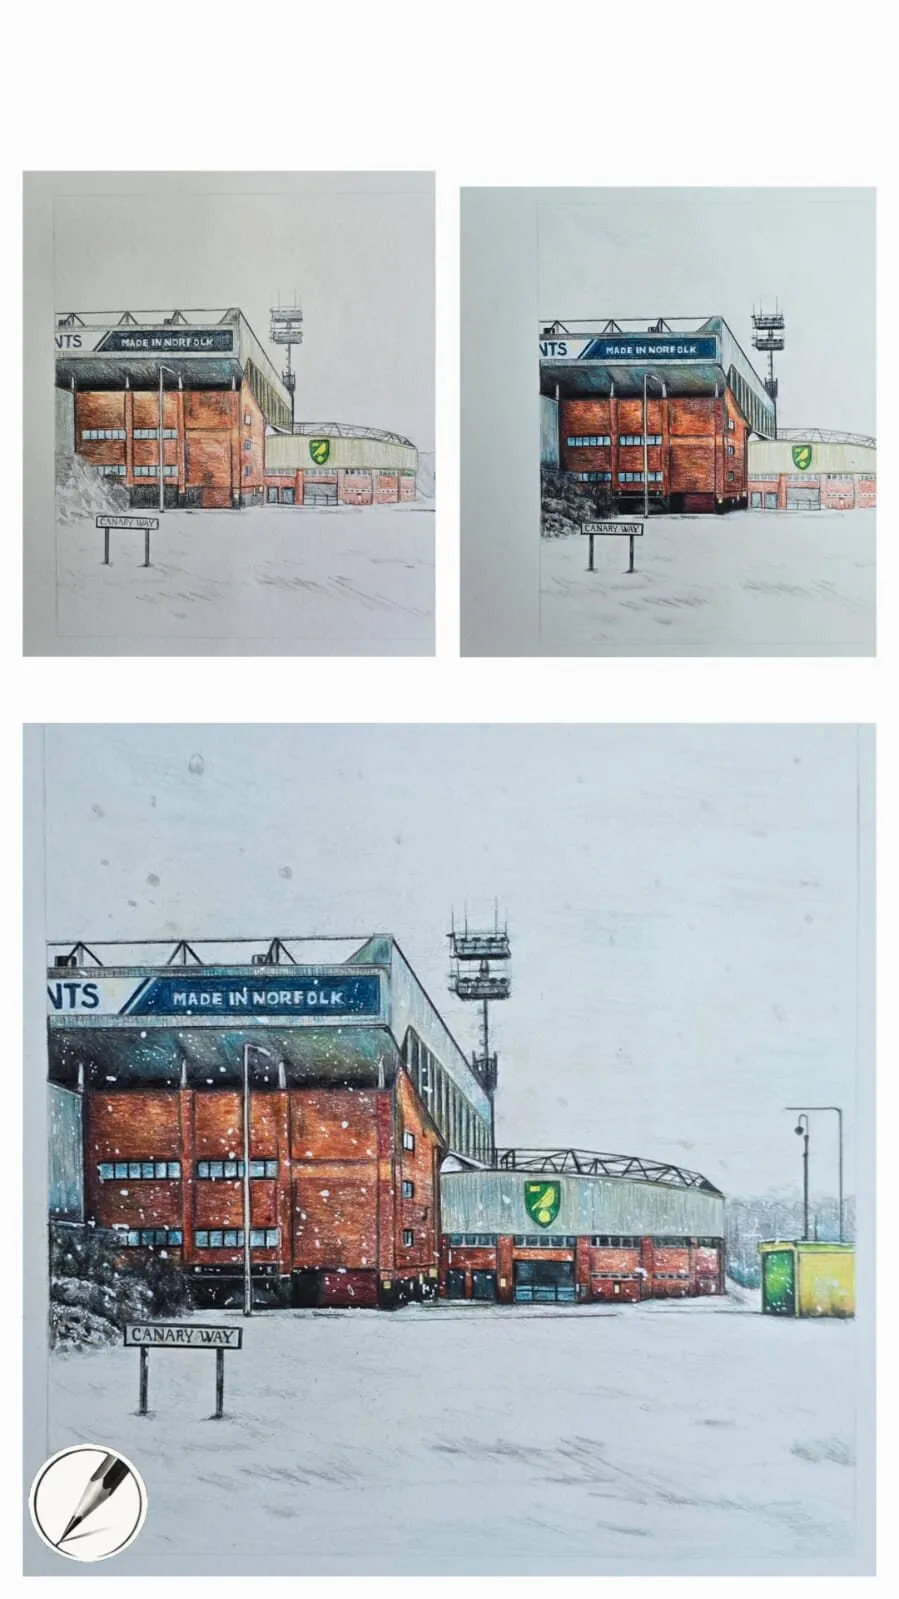
Layout first, then base colours across the whole scene, then the final layers of detail.
Stage three: the final layers of detail
The stadium figure’s caption makes the point directly: the last stage is the final layers of detail. This is where texture, sharp edges, crisp highlights and the strongest darks arrive.
Detail is most effective when it is placed on a drawing that already works. If form, colour and value are right, a few sharp details will make the image look highly finished. If they are wrong, more detail will not save it. That is why detail is the last thing to add and the first thing to resist adding too early.
At this stage you might:
- Deepen the darkest darks to increase contrast.
- Add crisp, small highlights, especially on glossy or reflective surfaces. See how to draw glossy surfaces and how to draw shiny metal and reflections.
- Sharpen edges that have softened, and lift small lights where needed with the methods in lifting and erasing coloured pencil.
- Burnish areas that need a smooth, glossy finish, if that suits the subject. See how to burnish coloured pencils.
Working top down and building colour as you go
The progression figure shows a figure drawing in four stages, working top down and building colour as it goes. The image develops from the top of the page, and colour is built up gradually rather than applied at full strength in one pass.
There are two ideas at work here, and both are useful.
Working top down. Working from the top of the page downwards keeps your hand off finished areas, which reduces smudging. It is also a natural way to keep the drawing organised, since each section is complete before the next. Michael’s figure drawing shows this approach in its sequence. Keep a sheet of scrap paper under your hand for extra protection.
Building colour as you go. Each pass adds a little more colour and depth. Early layers are light and loose, and later layers are richer and more controlled. Colour is not chosen once and applied at full strength. It is developed. That is the same layering logic that runs through all coloured pencil realism.
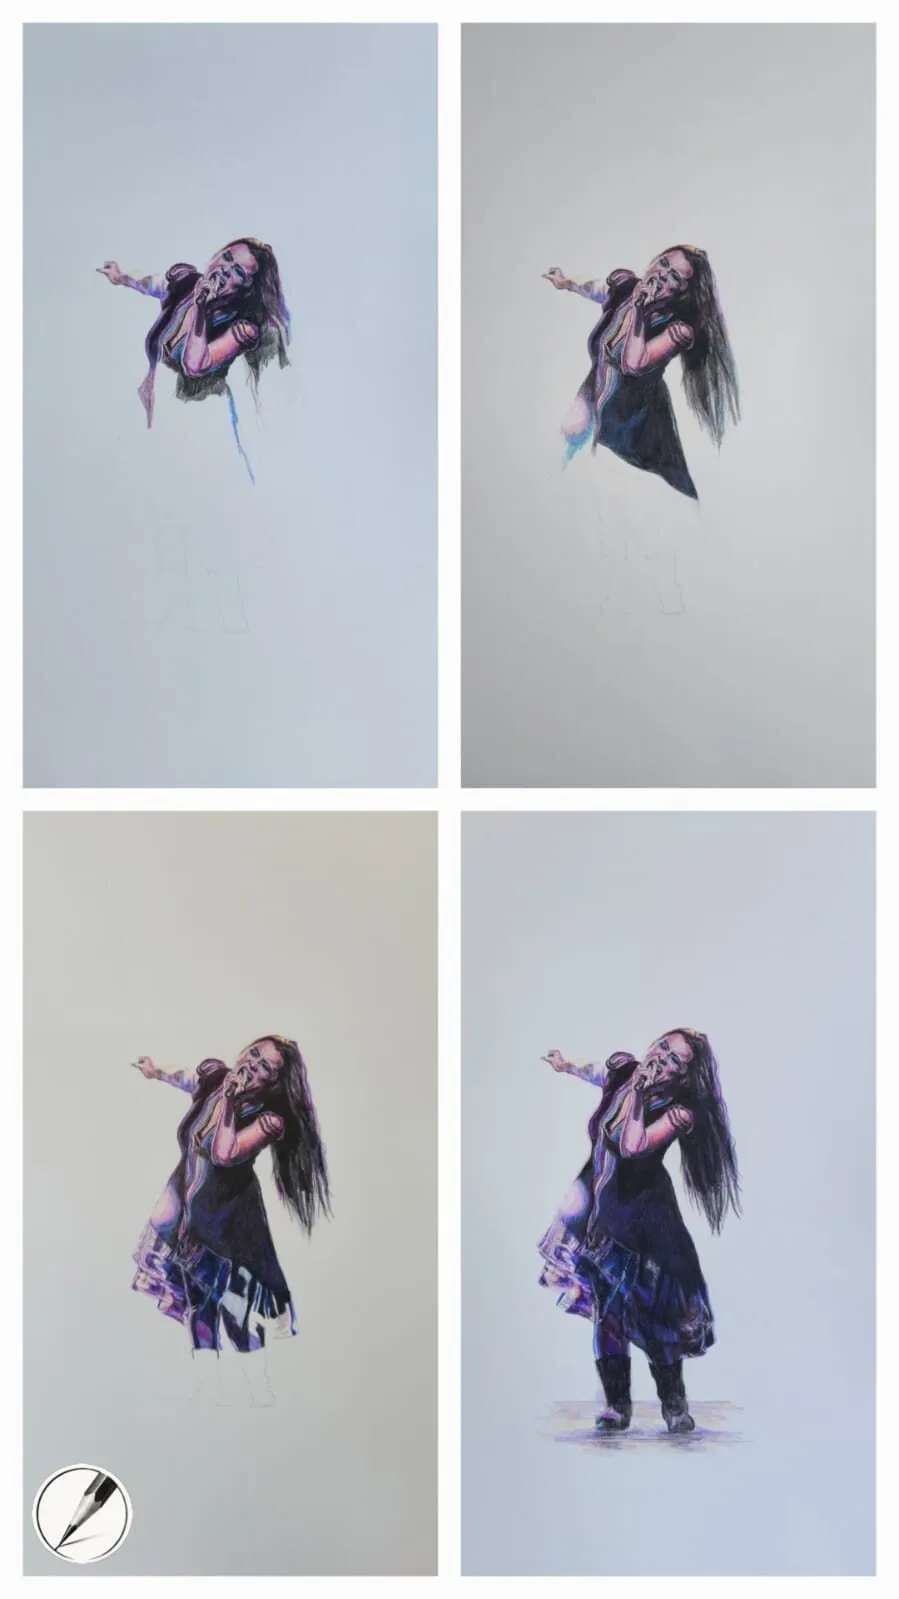
Four stages of one drawing: colour and detail build gradually as the work moves down the figure.
Note the difference from the whole-image approach in stage two. Both can work together. Lay in base colours across the whole picture for balance, then, when you reach detailed rendering, work methodically from the top to protect finished areas.
Skills progress by returning to a theme
One of Michael’s figures places two drawings of the same subject side by side, made at different times. The difference between them is the clearest evidence of progress. The later drawing has better control of proportion, more convincing colour and more refined detail.
The lesson is practical. Returning to a familiar theme is one of the best ways to improve, because:
- You already know the subject, so you can concentrate on technique.
- You can see exactly what has changed.
- Repetition builds the habits of layering, values and edges that make every drawing better.
That is a good reason to keep old drawings and revisit favourite subjects. For a routine that supports this, see how to practise drawing daily.
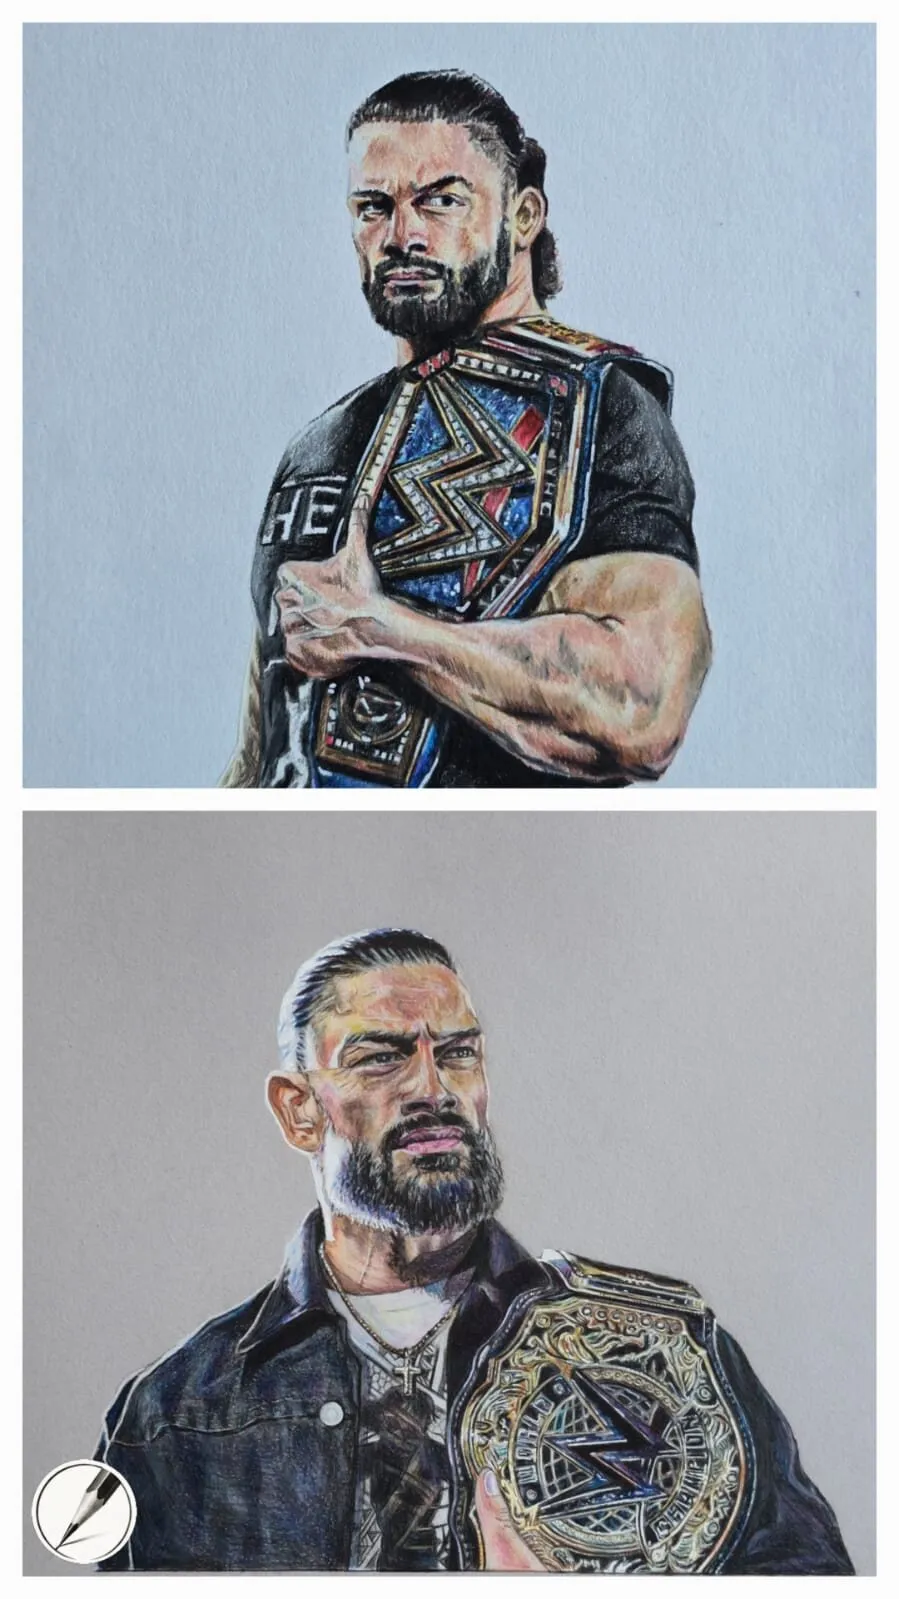
The same subject drawn at two different times. Returning to a theme makes progress visible.
Pose, shadow and movement
Composition and lighting can transform a drawing as much as technique. Michael’s dynamic pose figure shows a footballer caught mid-action, and it illustrates how adding shadow and grass gives the image movement.
- A dynamic pose creates energy through diagonal lines, twisted forms and a sense of balance in motion.
- Shadow anchors the figure to the ground and adds weight. A cast shadow makes a figure feel as if it exists in a space.
- Surrounding detail, such as grass, gives context and reinforces the direction of movement.
These belong in the layout and base stages, not the final detail, so think about pose and shadow before you begin colouring.
A practical sequencing checklist
Use this list as a running order for your own drawings.
- Choose the subject and the paper. Grey paper suits glossy and reflective work, while white or smooth paper suits skin and soft subjects. See the best paper for realistic drawing.
- Plan the values. Use the value study tool to find your lights and darks.
- Complete the layout. Draw the whole image lightly, checking proportion and composition.
- Decide the pose, shadows and edges. Settle the big design decisions now.
- Lay in light base colours across the entire image. Keep pressure low.
- Build mid-tones and darks across the whole image. Compare areas against each other.
- Step back and correct. Fix values, colours and proportion while changes are still easy.
- Add the final layers of detail. Work top down if smudging is an issue.
- Place the sharpest highlights and darkest darks last.
- Sign, photograph and rest. Leave the drawing for a day, then look again with fresh eyes.
To practise this order, try a lesson such as drawing a portrait from a photo, browse coloured pencil drawing ideas, or start the 30 day drawing challenge. Coloured pencils are called colored pencils in the US, and everything in this guide applies to both.
The short version
Complete the whole layout first. Lay base colours across the entire image. Build depth in stages, working top down where it helps, and keep the final layers of detail and the sharpest highlights for the end. Return to familiar themes to see your skills improve, and settle pose and shadow early. For the layering technique that underpins every stage, continue with how to layer coloured pencils.
Where to buy
Recommended products
Affiliate links. We may earn a small commission if you buy, at no extra cost to you. Why?
Paper · Canson
Canson Mixed Media Grey Paper
A toothy mid-tone grey paper that grips pigment and makes highlights glow.
Quick answers
Frequently asked questions
What order should you draw a coloured pencil drawing in?+
Start with a complete, accurate layout, then lay in base colours across the whole image, then build up depth and value, and finish with fine detail and highlights. Working over the whole picture at each stage keeps colour and tone balanced and makes it easier to fix problems early.
Should you finish one area before moving on?+
Generally no. Finishing one part in full detail makes the rest of the drawing look unfinished by comparison and makes it hard to judge colour and value. Bring the whole image up together in stages, and keep the sharpest detail and strongest contrast for the end.
How long does a realistic coloured pencil drawing take?+
It varies widely with the size, the subject and the paper. Complex, heavily layered work takes far longer than a simple study. Rather than aiming for a time, plan the stages and judge progress by how much of the image has reached each stage.
How do you improve at realistic drawing?+
Return to the same theme or subject over time and compare the results. Repeating a subject shows exactly where your control of layout, value, colour and detail has improved, and it lets you focus on refining one skill at a time instead of solving a new subject each time.
Is the process the same for colored pencils and coloured pencils?+
Yes. They are the same medium with different spellings, so the layout, base colour and final detail stages apply whichever you use.