How to Draw
How to Draw a Bird: Shapes, Feathers and Colour
Draw a bird from simple shapes to feathers: wing structure, beak and eye, feather direction, and how to build iridescent colour in coloured (colored) pencil.
This guide contains affiliate links. If you buy through them we may earn a small commission at no cost to you. How this works.
Jump to recommended products
Key takeaways
- ◆Build a bird from an egg-shaped body, a smaller circle for the head and a tapered wedge for the tail before you think about feathers.
- ◆Feathers grow in overlapping groups that follow the form, so draw the groups first and single feathers only at the edges.
- ◆The eye and beak decide the character: place the eye carefully, keep the beak simple, and add a small crisp highlight.
- ◆Dark plumage is rarely black - layer blues, greens and warm browns to get iridescence and keep the darks rich.
- ◆Draw feather direction with your pencil strokes so the texture describes the form instead of sitting on top of it.
Birds look intimidating because of the feathers, but the structure underneath is simple. A bird is a compact body on a pair of legs, with a head that sits on a flexible neck, and the plumage is a layered coat that follows that structure. Draw the shapes first, then the feather groups, and only then the details.
This lesson takes you from basic shapes to wing and feather structure, the beak and eye, and the layering that gives a bird colour and sheen. It works in graphite or in coloured pencils (colored pencils in the US). A rooster is the main example throughout, since its dark plumage, orange neck feathers and blue-green tail show exactly how colour builds on top of structure.
What you need
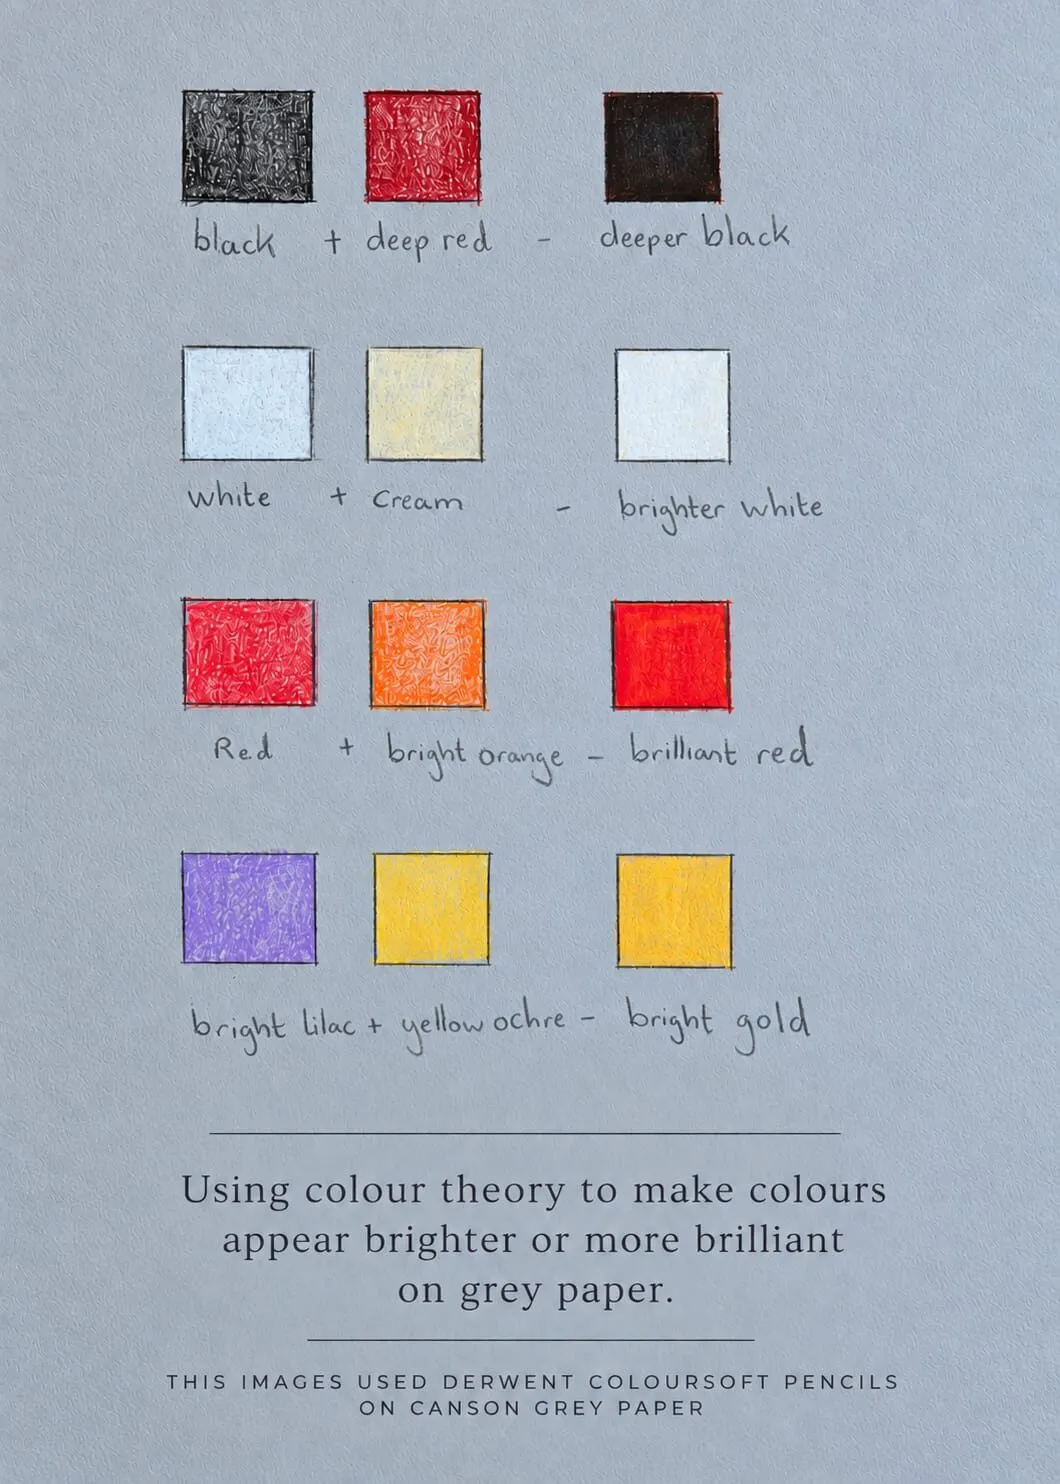
- Paper: grey or toned paper suits dark or glossy birds because you can use white and pale colours for highlights. See why grey paper works for coloured pencil.
- Pencils: an HB for the layout and a range of sharp coloured pencils. Firm, oil-based pencils such as Faber-Castell Polychromos keep a fine point for barbs and eyes. A black, a dark blue and a dark green are essential for dark plumage.
- Reference: a sharp photograph in even light, with the eye and beak clear. Avoid heavy shadows that hide the feather groups.
- A kneaded eraser for lifting lines and a sharpener you can rely on.
Two dogs in a snowy scene by a fence post, drawn in coloured pencil. Drawing by Michael Brace.
Basic shapes
Every bird can begin as three shapes: an egg for the body, a circle for the head, and a wedge for the tail. Join the head and body with a short neck, and add a line for the beak and simple lines for the legs.
- Draw the body egg, angled to match the pose. An upright bird such as a rooster has the egg tilted up; a duck sits flatter.
- Add the head circle, sized against the body. Smaller songbirds have proportionally larger heads than large birds.
- Draw the wedge of the tail. Check where it ends relative to the feet, as beginners often make it too short.
- Add the legs. Bird legs attach further back on the body than you might expect, and the “knee” you see bending backward is really the ankle.
- Sketch a centre line through the head and body to keep the pose balanced and the eye and beak aligned.
Wing and feather structure
A wing looks like a mass of feathers, but it has a clear order. Learn it once and you can draw any bird.
- Shoulder and upper wing: small covert feathers overlap in rows like roof tiles, curving over the wing bone.
- Flight feathers: long primaries at the tip and secondaries closer to the body. When the wing is folded they stack in a tapering blade along the side of the bird.
- Tail feathers: long shafts that fan or stack from the base of the tail. On a rooster, the curved sickle feathers add drama and colour.
- Body feathers: smaller, softer feathers that overlap down the breast and belly, often with a fluffier edge than the wing.
Draw these as groups first. Block the wing as a shape divided into the covert rows, the secondaries and the primaries, and darken the gaps between the groups. Then draw a few individual feathers at the edges and where the light catches them. Drawing every feather makes the bird look stiff and fussy.
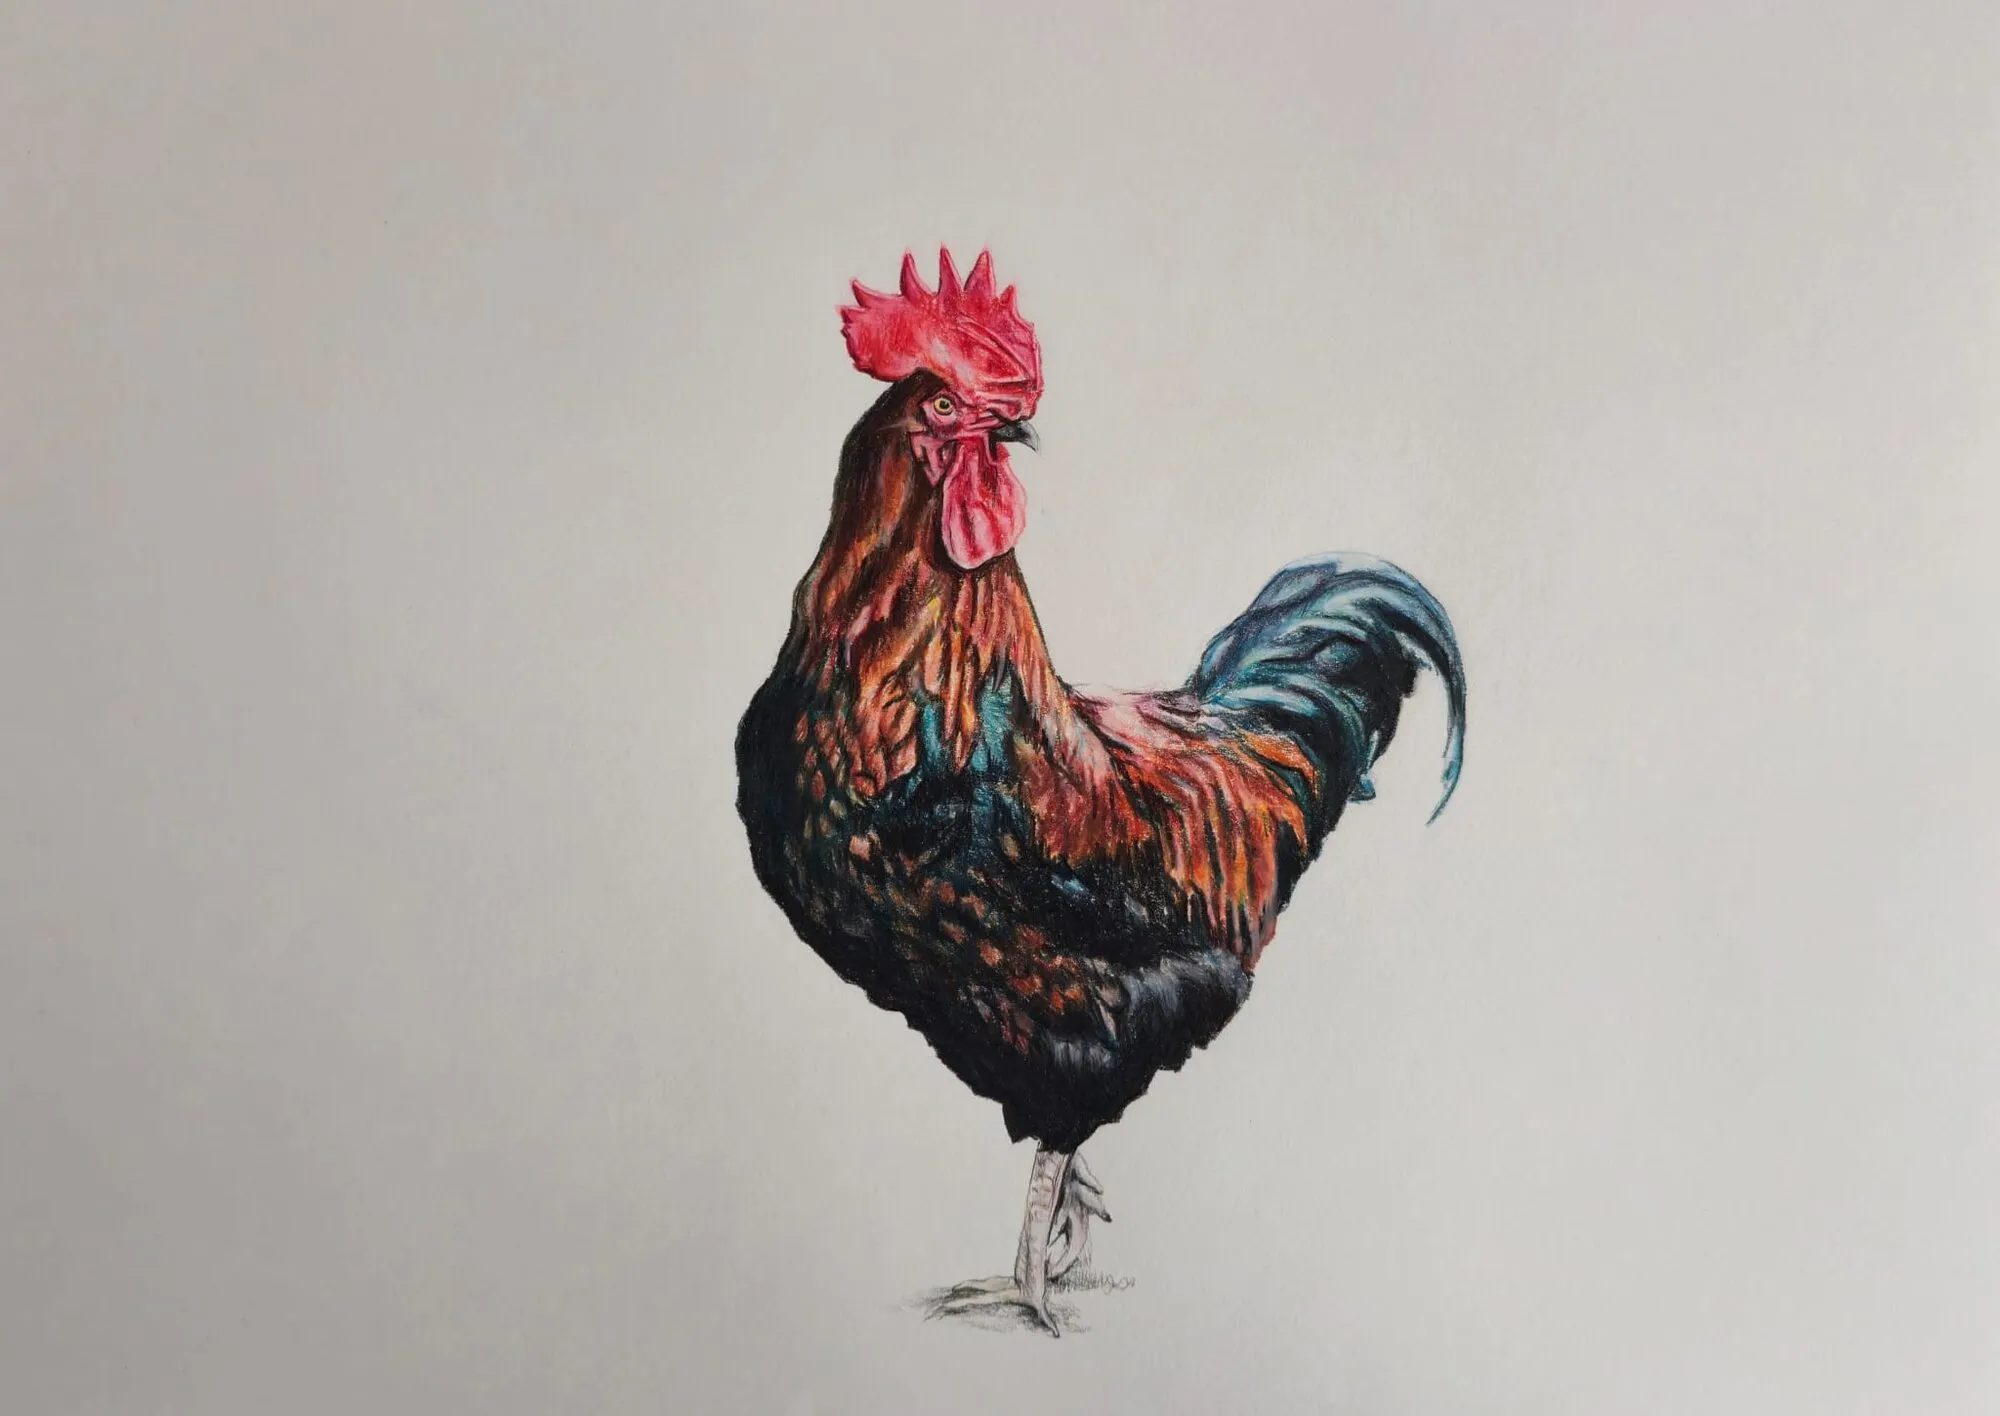
A rooster drawn in coloured pencil. Drawing by Michael Brace.
Beak and eye
The head is where a bird comes alive, so give it time.
The beak. Look at the shape of the upper and lower parts and where the mouth line meets the face. Draw the top as a curved wedge and add the small nostril near the base. The beak has a hard, glossy surface, so it takes a soft highlight along the top edge and a darker tone beneath.
The eye. Birds’ eyes are set on the side of the head. Draw a small circle, place a darker pupil at the centre and leave a crisp point of white for the highlight. The surrounding skin or feather ring gives the eye its expression: a rooster’s eye is small and sharp against red skin, while a songbird’s is a dark bead in soft feathers.
Keep the eye slightly darker at the edge and place its highlight on the same side as your light source. An eye with the highlight on the wrong side looks glassy and wrong.
Feather direction and layering
Once the structure is right, use the pencil strokes themselves to describe the form. Every feather group has a direction: down the neck, curving around the breast, flowing back along the wing toward the tail. Draw your strokes in that direction and they will do half the work of making the bird look three-dimensional.
- Light base layer. Lay in the local colour with light pressure and short, directional strokes. Cover the paper gently, staying inside the feather groups.
- Dark gaps. Deepen the shadows between overlapping feathers so each group reads as a separate layer.
- Mid-tones. Build the mid-tones along the direction of growth, tapering strokes at the tips.
- Edge details. Add individual feathers at the outline, and let some strokes break out of the silhouette to suggest a soft, feathery edge.
- Highlights last. Add pale strokes where light catches the top edges of feathers, following the direction of growth.
For a similar approach to fur, see how to draw animal fur, and for building layers with control see how to layer coloured pencils.
Colour and iridescence
A rooster is a good study in colour. From a distance the body reads as dark, but up close it contains blue-green, teal, orange, red-brown and near-black. The neck feathers carry warm oranges and reds, and the tail turns from black to blue and green.
Some practical guidelines for dark and iridescent plumage:
| Plumage | Colours to layer |
|---|---|
| Black or dark body | Dark blue, dark green and dark brown before black |
| Sheen on dark feathers | Blue-green or teal along the top edge of curves |
| Warm neck or breast | Orange, red-brown and a touch of yellow ochre |
| Red comb and wattle | Warm red, a deeper crimson for shadow, and a pale pink highlight |
| White or pale feathers | Soft grey, blue and cream shadows, with white only for the brightest edges |
The important idea is that iridescence is a colour shift between the lit and shaded parts of a feather. Keep the dark areas properly dark so that the blue-green sheen glows. The value in drawing guide explains why contrast makes colours look brighter, and the colour scheme generator helps you plan a palette.
The graphite version
A graphite bird is a good way to learn structure and value before adding colour.
- Use an HB for the layout, then a 2B and 4B for feather tone, following the direction of growth.
- Leave the paper white or lift graphite with a kneaded eraser for pale feather edges.
- Use a 6B for the eye, the deepest gaps between feathers and the underside of the tail.
- Check your value range in the value study tool if the drawing feels flat.
Common mistakes
Fixes: return to the shapes and check proportions; mark feather groups before adding details; layer blue, green and brown under black; and let some edges stay soft and broken so the bird looks feathered rather than outlined.
Step-by-step summary
- Draw the body egg, head circle and tail wedge.
- Add the neck, beak line, legs and centre line.
- Divide the wing and body into feather groups.
- Draw the beak and eye, with the highlight in the eye.
- Lay a light base of colour or graphite following feather direction.
- Deepen the gaps and shadows.
- Add colour shifts and sheen on the darks.
- Draw individual feathers at the edges and add highlights.
Practice exercises
- Shape birds: draw ten birds from photographs using only the egg, circle and wedge.
- Wing studies: draw a single wing, closed and open, labelling coverts, secondaries and primaries.
- Eye and beak: draw the head of three different species at large scale.
- Dark feather swatch: make a small patch of dark plumage with layers of blue, green and brown and compare it with plain black.
If you want to go deeper into bird anatomy, the best books for animal drawing includes bird references, and the horse lesson shows how the same shape-first method works for a larger animal.
The short version
Build the bird from an egg, a circle and a wedge, then divide the plumage into overlapping feather groups. Give the eye and beak careful attention, draw strokes in the direction of growth, and layer blues, greens and warm browns instead of flat black. Keep the darks deep, add highlights last, and check your proportions before you add detail. When you are ready for another subject, return to the how to draw hub.
Where to buy
Recommended products
Affiliate links. We may earn a small commission if you buy, at no extra cost to you. Why?
Pencils · Faber-Castell
Faber-Castell Polychromos
Firm, oil-based artist pencils that hold a point - a benchmark for detail and clean layering.
Book · Raymond Sheppard
Drawing Birds
Feathers, wings and avian structure.
Buy on AmazonAffiliate link · opens Amazon
Quick answers
Frequently asked questions
What is the easiest bird to draw for a beginner?+
Pick a bird with a clear, simple silhouette and a still pose, such as a robin, duck or garden hen. Rounded bodies are easier than long-legged wading birds. Use a photograph of the bird standing or perched side-on, so you can see the shapes of the body, head and tail.
How do you draw feathers realistically?+
Draw them in groups rather than one by one. Block in the wing and body into layered rows that overlap like roof tiles, then add a few individual feathers along the edges and at the tail. Follow the direction each group grows and darken the gaps between overlaps to show depth.
How do you get iridescent colour in coloured pencil?+
Layer several hues rather than using one. A dark green or blue-green over black gives a metallic sheen, warm oranges and reds add glow, and light strokes of pale colour on the top edges of feathers suggest reflected light. Keep the transitions smooth and the darks deep beside the bright areas.
Are colored pencils and coloured pencils the same?+
Yes, they are the same product. Colored is the US spelling and coloured is used in the UK and elsewhere. Either wax-based or oil-based pencils work for feathers, but firmer oil-based sticks hold a sharper point for fine barbs and edges.